
These days, PowerPoint is not only used for creating presentations, but also for e-learning courses, interactive kiosk displays, marketing collaterals, and even video. There are plenty of ways you can add non-photographic graphics to your PowerPoint authored content. You can use the built in Microsoft pictures, stock illustrations from various online providers or have them custom built by a graphic designer.
But now, you can build your own professional and editable PowerPoint graphics, right within PowerPoint. Why would you want to do this?Natively drawn PowerPoint graphics are editable. That means you can change the text and restyle (colours, effects, fonts) the various elements according to your design and/or branding needs. They are also vector graphics (as opposed to bitmaps) which means you can scale them indefinitely, without loss of resolution. Bitmaps however, become pixelated when enlarged too much. You just need a drop of creativity and a few techniques in your toolbox.
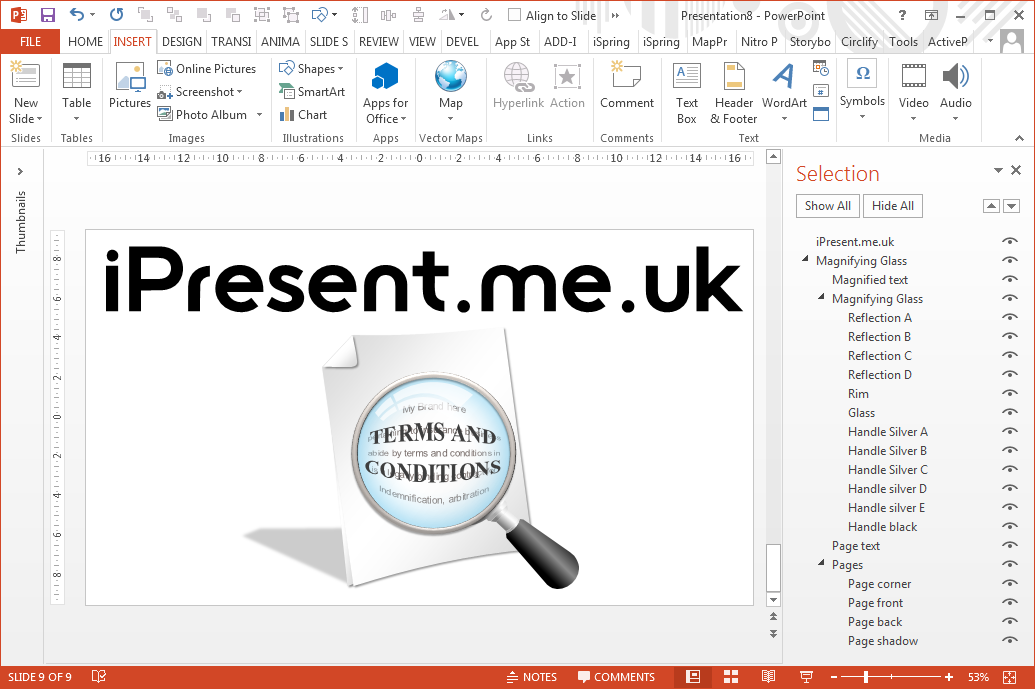
In this tutorial, we’re going to show you how to build the editable graphic above, which is entirely made within PowerPoint (2010 onwards) and is freely downloadable in its source format and you may use it under the terms of the Creative Commons attribution license (you must give credit to us by stating “Source graphic by youpresent.co.uk”).
Some of the techniques used include:
- Tracing with freeform shape tool
- Editing shape points
- Combining (Merging) shapes
- Gradient fills
- Semi transparent fills
- Shape effects
- Text transforms
- Layer order control
Part II – Paper Pages
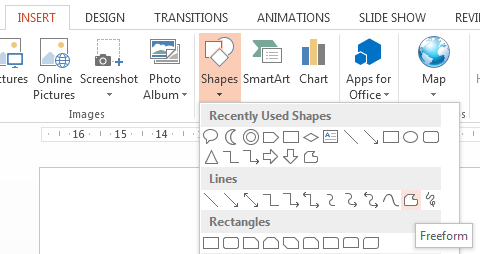
From the Shapes gallery, choose the Freeform tool:
Next, click a corner of the front page in the graphic and then subsequently click at each of the other 4 corners, finishing with a double click at the last point (which is also the first point). Don’t worry about the curves just yet.

If you see a solid shape, it’s useful at this stage to change the fill to No Fill, Border Color to red and Border Weight to 1/4 pt and then right click on the shape to select Set as Default Shape (make sure you’re using a blank template and don’t do this in your corporate template!).

Once you have your outline, right click on the shape and select Edit Points.
You can then click on each point (black dot) in turn and drag the two corresponding control handles (white dots on the end of blue lines) to match the curvature of the page. When you’re happy with the result, hit Escape or just click outside of the shape to exit the edit points mode.

For the turned page corner, use the same Freeform tool to create a triangular shape that crosses the two corner points of the front page shape, making sure that the triangle extends out from the top left of the page (you’ll see why in the next step). Then, use the same edit points tool to create a curve on the lower point.

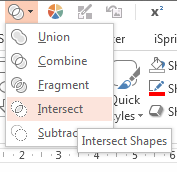
This next part uses the new PowerPoint Combine Tool which you can enable in your QAT (Quick Access Toolbar) by going to File / Options / Quick Access Toolbar and selecting the Combine Shapes (or Merge Shapes in 2013) button from the Drawing Tools | Format Tab section in the drop down.
Because this tool is destructive (you loose one or more of your original shapes), you first need to copy the front page shape to your clipboard. To do this, click on its outline and press Ctrl+C or the Copy button in the ribbon.
Next, hold the shift key and select the page corner shape so that you have two shapes selected.

Click the Combine Shapes button (or Merge Shapes in 2013) and click Intersect to create a single page corner shape that exactly matches the edge of the front page shape (this is why we created the overlap in the earlier step).
Now press Ctrl+P to paste back the front page shape.

Use the same freeform tool to create the back page with 3 points (this shape can overlap the front page as it will be behind it eventually).

Then, the last shape for the pages is a special one which we will use to create the drop shadow. We don’t want it to occupy the bottom edge as the drop shadow will not look right. Draw a triangular shape that crosses the bottom left and top right corners of the main page shape.

Select and copy the front page to the clipboard again.
Select the main page first, then with the shit key held down, select the new shape.
Now click the Combine (Merge) tool and click Subtract (this is why the selection order is important with this option of the tool).
Paste the front page back from the clipboard and you should now have all of the page shapes.

We’re going to format the page shapes now with fill and effects.
Select the page corner shape and set it’s Format as follows:
- Shape Outline : No Outline
- Shape Fill : Gradient :
- Type : Linear, 45°
- Stop 1 : Positon 0%, Transparency 0%, Color light grey
- Stop 2 : Positon 50%, Transparency 0%, Color white
- Stop 3 : Positon 100%, Transparency 0%, Color light grey
- Shape Effects : Shadow : Offset Diagonal Bottom Right
Copy and paste the format from the page corner shape to both the front page shape and the back page shape using the Format Painter tool in the Home tab of the ribbon.
Select the shadow shape (the one that crosses the main page diagonally and set it’s Format as follows:
- Shape Outline : No Outline
- Shape Fill : White
- Shape Effects : Shadow : Perspective Diagonal Upper Left
Use the Arrange tool to set the layers of the 4 object as follows: (you can also do this in the selection pane, where you can optionally add names to your shapes for ease of identification)
- Page corner (top)
- Page front
- Page back
- Page shadow (bottom)
You should now have something like this (the image we are tracing around has been hidden for clarity):

Part III – Magnifying Glass
The magnifying glass is made up of four main parts:
- Handle
- Rim
- Glass
- Reflection
Trace around the handle using the Freeform tool and then adjust the curves using the Edit Points mode as described earlier in this tutorial.

To make the silver parts of the handle, use the ‘draw, copy, subtract, paste’ technique that was used to create the page corner. We used various combinations of oval shapes with the Combine (Merge) tool to get the curves right.

When finished, you should have a set of shapes like this for the handle:

Format these shapes with gradients as required, for example, this is the one for the handle:
- Shape Outline : No Outline
- Shape Fill : Gradient :
- Type : Linear, 315°
- Stop 1 : Positon 38%, Transparency 0%, Color black
- Stop 2 : Positon 56%, Transparency 0%, Color medium grey
- Stop 3 : Positon 81%, Transparency 0%, Color black
To get the gradient just right, you may need to tweak your values until you are happy.
Do the same for the silver parts of the handle.

To add the rim of the magnifying glass, use the Donut tool from the Insert | Shapes gallery to create a thin donut shape.

Format the donut shape as follows:
- Shape Outline : No Outline
- Shape Fill : Light gray (we used RGB 230,230,230)
- Shape Effects : Bevel : Circle
For the glass, use the Oval tool from the Insert | Shapes gallery to create a circle whose circumference sits in-between the inner and outer part of the donut shape.

Then format this circle as follows:
- Shape Outline : No Outline
- Shape Fill : Gradient :
- Type : Radial
- Direction : From center
- Stop 1 : Positon 32%, Transparency 100%, Color white
- Stop 2 : Positon 100%, Transparency 0%, Color medium blue
Finally in this part, for the reflection, trace around the 4 reflection shapes using the Freeform shape tool and then edit the points to create the curves.

Format the 4 shapes with the same settings as follows:
- Shape Outline : No Outline
- Shape Fill : white, 30% transparency
Use the Arrange tool to set the layer order as follows:
- Rim (top)
- Reflection
- Glass
- Handle (bottom) : group all parts together
Finished Result!
And now you have a fantastic looking and most importantly, editable and scalable graphic for use in various PowerPoint productions.
The PowerPoint file is freely downloadable in its source format and you may use it under the terms of the Creative Commons attribution license (you must give credit to us by stating “Source graphic by youpresent.co.uk”).