The PowerPoint Magnifier tool is part of the G-Tools add in and provides a quick, easy and cool way to provide focus on a particular area of an image or slide.
Download G-Tools for PowerPoint
We’re going to show you how to make the most of the tool when focussing on a part of an inserted picture (the tool also supports other slide objects such as tables, charts, background graphics etc.)
PowerPoint Picture Resolution
The first thing to note is that the magnifier works by scaling the focal area of the picture. So, the picture must have enough resolutions (dots per inch) to enable it to remain sharp when it is enlarged. This means you will need to insert an image that is larger than the area you want it to normally occupy on the slide and the scale it down to fit the desired area.
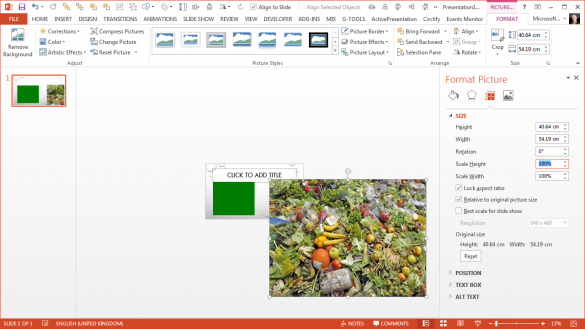
In this example, we’ve inserted a picture that at 100% scale is almost twice the size of our slide and around three times the size of our target green box:
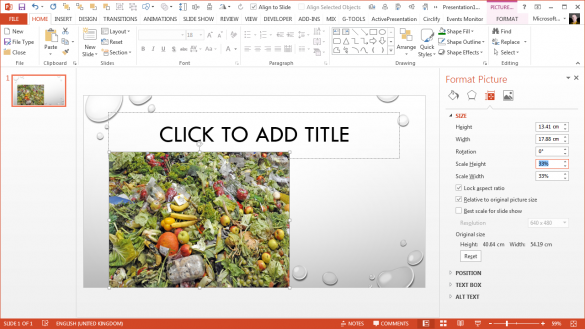
This means that when we scale the picture down to the green area, which is 33% of the original picture dimensions, we still have enough resolution in the picture to be able to magnify it back by up to 300% without it becoming blurred. Here is the image scaled down:
Adding the PowerPoint Magnifier
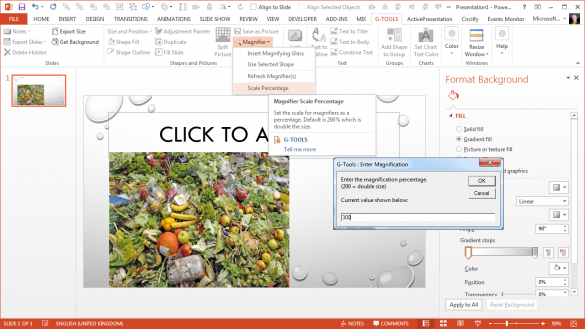
Now we can insert the magnifier tool using G-Tools. Click the G-Tools tab in the ribbon and first, set the magnification by clicking Magnifier followed by Scale Percentage. We’re setting it to 300% to get the maximum magnification without loss of resolution for this picture:
Now click the Magnifier drop-down button and select Insert Magnifying Glass to insert the magnifier at a default position:
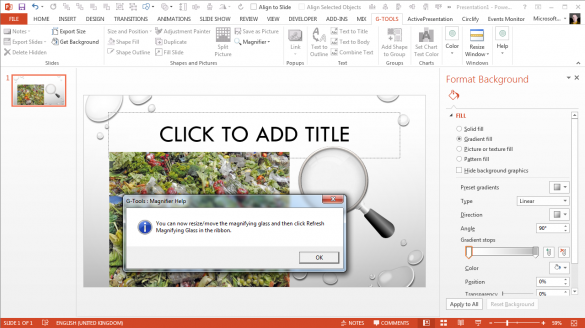
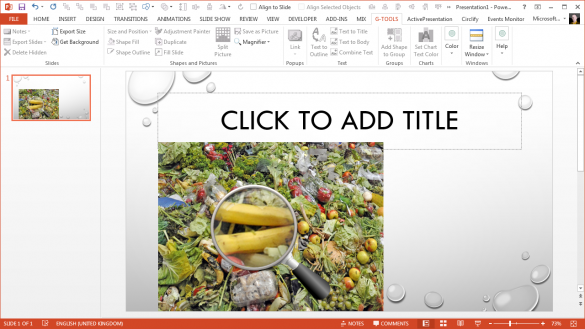
We can now move the magnifier and then select Refresh Magnifier(s) from the Magnifier menu:
Sharpen Image
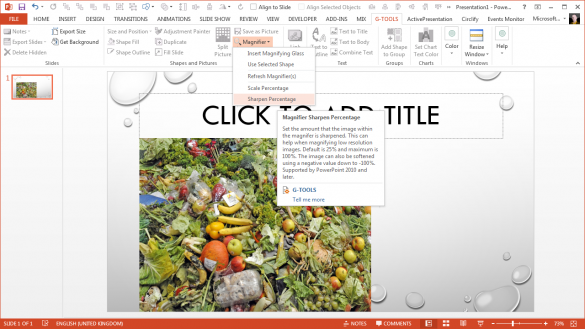
Depending on the resolutions and scaling on the picture you are adding the magnifier above, you may find that the image is blurred when enlarged. You can compensate for this with the Sharpen setting of the Magnifier tool:
The magnifier tool will also check the available resolution in the underlying picture against the scale percentage you have set for the magnifier and warn you if it’s likely that the image will become blurred when enlarged:
PowerPoint Is Destructive
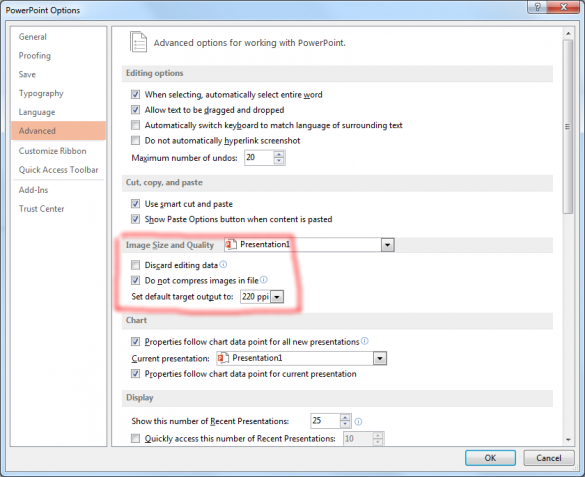
The next important point to note is that PowerPoint is destructive when it comes to saving images in a presentation. Depending on your default settings, PowerPoint may automatically rescale images, discard cropped parts and even compress them when you save your presentation. If this happens before you create your magnified area, the picture in the magnifier will appear blurred.
Before you save your presentation, make sure that the image compression settings under File / Options / Advanced are set like this:
You can of course change these settings once you’re happy with all of you images and allow compression to shrink the size of your PowerPoint file.
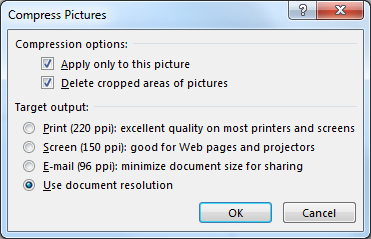
And finally, don’t use the individual or multiple picture compression tool in PowerPoint until you are sure you don’t want to make any further image changes. This tool is available when any picture is selected and you click the Format tab followed by Compress Pictures:
